
Creating 3-dimensional Form
Apr 12, 2021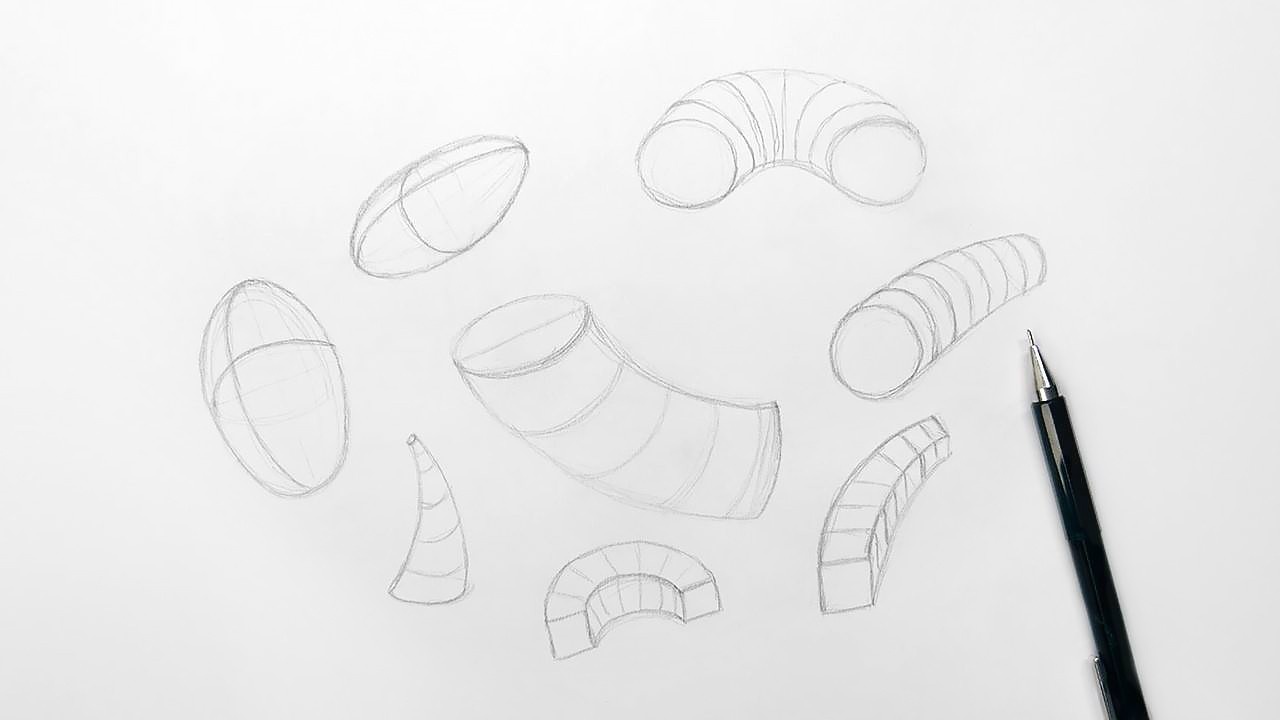
The element of Art: Form
Form is one of the elements of art. The elements are line, shape, form, space, texture, value, and color. We cover them all in a series of blogs.
Creating 3-Dimensional Form
Form is an important element because this is where you learn how to make an object look 3-D. A shape will become 3-D by adding form which gives it depth, you start by using simple forms. Later on, you’ll combine separate forms into more complex forms. Learning to draw forms well is important because this will make your drawings more natural-looking.
How to see things in 3-D
Everything in life can be broken down into smaller forms like spheres, cones, cylinders, and cubes. If you can draw basic shapes from different perspectives then you can draw anything. It will take time to understand how to make a shape look 3-D but with practice, you will have learned how to apply the steps. In time you will be able to recognize these shapes in real life or in a reference photo and know how to draw them.

Imagine placing rubber bands around an object and notice how the lines form. And also, pay attention to how the light falls onto an object and creates a shadow. Where the light changes is also where the line curves.
3-D Circles
To make your circle come to life and create depth you need to add lines. Start with a basic circle and draw a line from top to bottom in the middle of the circle. The middle line is used as an invisible guideline. Also, add a horizontal middle line and make sure this line is perpendicular to the vertical line. (perpendicular = 2 lines that cross and create a right angle of 90 degrees) Remember to keep your sketch lines as light as possible.

Now draw a horizontal oval in the middle (a circle in perspective is called an ellipse), use the middle line as a guide and create equal parts on both sides. Think of it as if you’re wrapping a rubber band around a ball. Also, draw a vertical oval. We started with a flat circle but once we added depth with lines it’s called a sphere. Make sure you draw one side of the ellipse darker than the other because the lighter line is on the side of the circle you won’t see.
You can also change the angle of the middle lines if you want the sphere to face another way just make sure that the horizontal line is perpendicular to the vertical line.

3-D Cylinder
If you look at a cylinder from the side you will see a rectangle and from above you will see a circle. But if you want to draw a cylinder from the top front side you will need to create a combination of 2 ovals and a rectangle.

Start by drawing a vertical middle line first and then two horizontal outer lines, top and bottom. Around the top line, you will draw a horizontal oval. The rectangle will go a bit inwards when you go towards the bottom because the cylinder is in perspective and we’re viewing it from above. The bottom oval will be a bit smaller than the top oval because again we’re viewing the cylinder from above. You can practice drawing cylinders from different angles by moving the middle line.
3-D cubes
In order to understand how to draw a cube, we will need to cover perspective drawing. To create an illusion of a 3-D object on flat paper you can use a one or two-point perspective. Perspective shows you how to see an object from a different angle. Perspective creates depth and this will make your object look 3-D.
When you look straight ahead, that’s called the horizon line. You always see the horizon line at your eye level. An object with depth has a vanishing point on the horizon line.

One-point perspective
Draw a square and choose a vanishing point in the middle of your horizontal line, then draw lines from two corners to the vanishing point. Because the square is in front of us but a bit under the horizon line (your eye level) we will see a bit of the top part of the cube. Draw the top part of the squares and use the perspective lines to create the cube.
If you’re having a hard time drawing straight lines use a ruler for this. If you are comfortable with your lines you can freehand them because they don’t need to be perfectly straight.
Look at objects
Look around you and try to see what objects look like in 3-D. Now also look at an object on your phone or computer. It’s much more difficult to see how an object is 3-D in a photo than in real life, that’s because the photo is flat. Practice this and try to change the way you look at an object.
In the drawing course within my membership, I will teach you all the basic elements of art step by step and give you plenty to practice with. Want to join? Check out the details here.
Emmy
_
Want to read more? Check out the other topics here.
Want to be notified of new blog posts?
Sign up and you'll receive an email when a new blog is posted.
We won't send spam and you can unsubscribe at any time.