
How to blend with Colored Pencils
Sep 27, 2021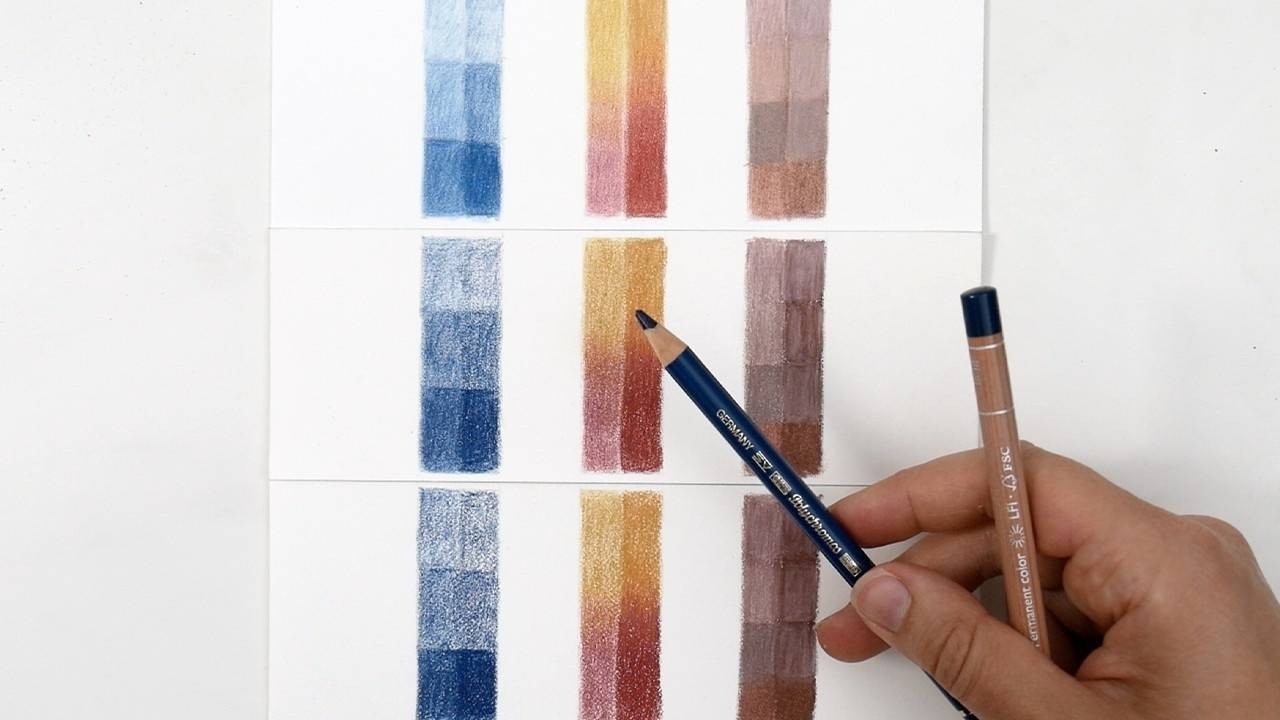
Blending with colored pencils is very different from blending with graphite pencils. You need to use different methods, a blending stump or soft tissue are of no use here.
In this blog, we will cover blending techniques and methods so you can learn how to create beautiful colored pencil drawings.
Paper
The best paper to use for colored pencils is paper that has a bit of a tooth. I use bristol vellum paper for my colored pencil drawings. By using paper with a bit of tooth the colored pencil pigment will have a better grip on the surface and you will be able to add more layers.
In the picture above you can see the different color outcomes on different types of paper. The first one is bristol smooth paper, the second is hot-pressed watercolor paper and the last one is bristol vellum paper.
You can try out different types of paper with your colored pencils to see which one you prefer because using the ‘right’ paper can really make a difference.
Learn more about the best kind of paper and pencils to use, in the blog: 'which art materials do I need to start drawing'
Layering
When using colored pencils you will blend the colors by adding layer after layer. It’s important to use light and consistent pressure because if you press too hard you will flatten the texture of the paper and it won’t be easy to add more layers.
Try to keep your pencil pressure consistent and always make sure your tips are sharp enough when coloring a layer, it will make the colors look more realistic. It will also help create nice smooth blended layers.
When it comes to layering, color gently, you will build up the layers, maybe 3, 5, or even more, until you can’t see the white of the paper showing through. When you’re coloring your last layer you can color with medium to hard pressure. Otherwise, you will keep on building up the layers with light pressure. If you want to get a smooth and glossy look you’ll have to keep adding layers until you’re satisfied.
Coloring with colored pencils takes time because you have to add several layers. So you’ll need to be patient.
Shading
Practice shading with small strokes. Your wrist will rest on the table, try not to move it too much while you color. If you move your wrist a lot your strokes will become longer and look more like pencil lines. You want to avoid this so the colored area will appear smooth.
While coloring, keep turning the pencil this will keep your tip sharp. If you don't turn the pencil or if you shade with just the tip straight onto the paper, your tip will become dull in no time and you will need to keep sharpening your pencils.
There are many shading techniques, the ones I use the most are “circulation” and “cross-hatching”.
- Circulation
This is something I use a lot. It is used for areas where the color needs to be smooth. To shade, move your hand in tiny circular movements. - Cross Hatching
I use this technique for bigger areas. It's a layering technique where you draw an area of lines all going in the same direction, then to make it darker you go over the area again with lines in another direction. And so on. Keep your lines close together if you want a smoother finish. - Burnishing
Using medium to hard pressure on your last layer is called burnishing. When burnishing you use medium to hard pressure to combine the layers and completely fill the tooth of the paper with color. By burnishing the last layer you will get a very smooth and shiny color. Make sure you only do this with your last layer because it will be difficult to add more layers or details after burnishing. - Highlights
You can use white as a blender but also for highlights. For example, if you want to create highlights you can use white to lighten that area. Some brands of pencils are better than others. The Luminance white is excellent as it is soft and opaque.
Just remember, using the right kind of paper, knowing how to layer your colors, and using the right shading techniques are important when creating your colored drawings. But most important of all is practice, practice, practice.....
If you would like to learn more about drawing with colored pencils you can join us in the membership. In the real-time drawing videos, you can follow my entire drawing process. While drawing, I think out loud, explain my techniques and show you how to fix mistakes when they happen.
You can also reach out if you want to so I can help you move forward. This way, you don’t have to figure it all out by yourself.
Read more details about the membership here and join us today so you can start practicing.
- Emmy
Want to be notified of new blog posts?
Sign up and you'll receive an email when a new blog is posted.
We won't send spam and you can unsubscribe at any time.